The Skin Stapler CCPD Investigation Walkthrough
Detective Dick Slater, Carrion City Police Department, and the stapled-body case files.
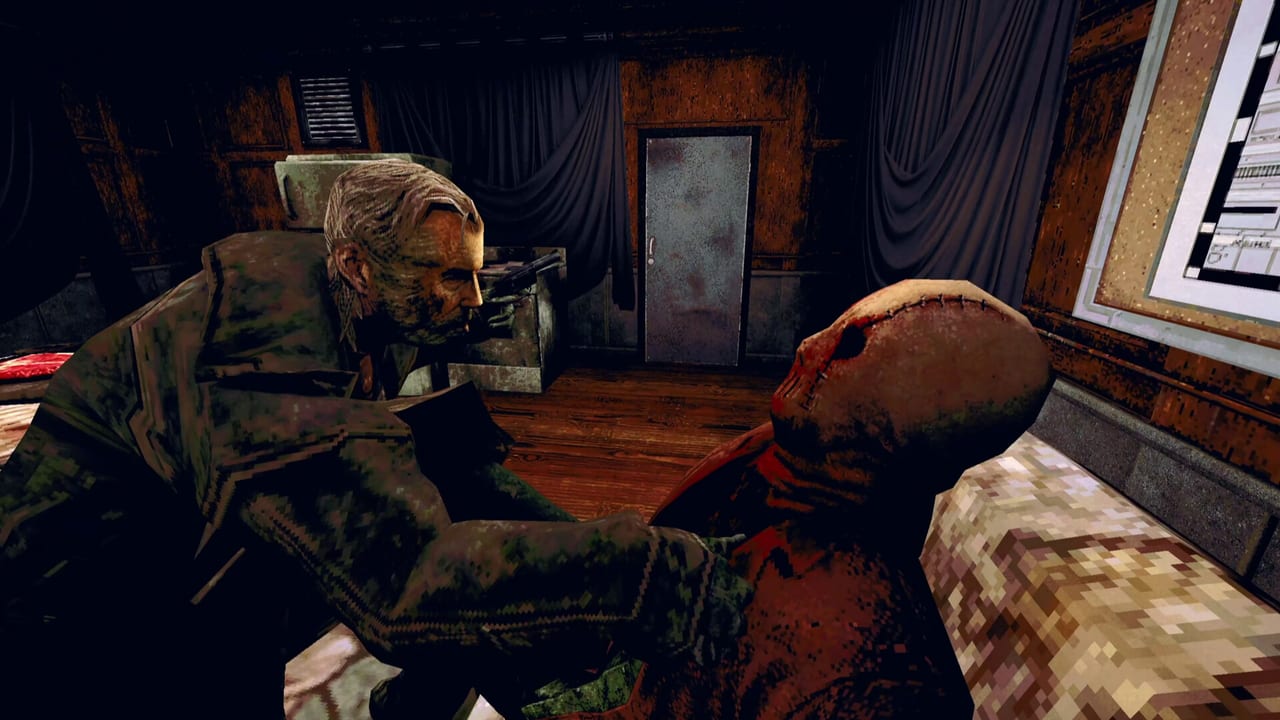
What the CCPD chapter is
The Carrion City Police Department (CCPD) is Detective Dick Slater’s home base in The Skin Stapler. This is where the Steam horror story frames its police procedural skin: low-res monitors, buzzing fluorescents, and case material about victims who were skinned and stapled to walls. Slater reads reports, listens to corrupted tapes, and prepares visits to Quick Fix and Gutters End—the same locations you later control as Hexy and Blair.
Treat CCPD as the investigation brain of the game. Victim chapters show what happened on the floor; the department shows what Carrion City officially knows.
When to use this guide
Open this page when:
- Dialogue loops without a new lead.
- You are unsure which file or photo matters after a perspective swap.
- A tape mentions a business name but no map marker appears yet.
- You return from a worker chapter and need to know what to re-examine at the desk.
For a single continuous route, see the full walkthrough. For store or alley sections, jump to Quick Fix or Gutters End. Avoid endings explained until you want heavy spoilers.
Starting at Slater’s desk
Early CCPD gameplay teaches interaction and examination. Move slowly through the bullpen, Slater’s office, and any interview rooms the story unlocks.
Talk to everyone with a prompt. Partners, clerks, and visitors may repeat lines until a trigger fires elsewhere. Exhaust dialogue before assuming a bug.
Pick up readable objects. Case folders, polaroids, and sticky notes often auto-add to your mental timeline even if there is no inventory screen fanfare.
Watch for VHS or CRT prompts. Tape review may require standing in front of a specific monitor or player. If nothing plays, finish another nearby interact first.
Working the staple murders
The killer’s signature is impossible to miss: removed skin, industrial staples, and staged walls. Slater’s job is to link each scene to a person and place.
Photos first. Compare staple patterns and background props to locations you recognize from trailers or worker chapters. Neon signage, lane colors, and store aisles are deliberate tells.
Audio second. Warped tapes may name victims, shift times, or insults the killer whispered. Replay audio after new photos arrive; distortion sometimes clears slightly on a second listen.
Timeline third. Note whether a tape references before or after closing. That ordering helps when the game asks you to choose which lead to chase.
We do not publish exact safe codes or file numbers as guaranteed solutions—patches and player order can change minor gates. Instead, verify you have every current photo and every current tape before leaving the building.
Interviews and soft choices
CCPD scenes use light dialogue branching. Choices rarely lock entire endings in demo-style horror, but they can delay the next room unlock if you dismiss a witness too early.
Stay in character as a tired detective. Ask implied follow-ups by re-interacting until lines exhaust.
Return after off-site chapters. Hexy or Blair may trigger new Slater lines back at CCPD even without a explicit objective pop-up.
Leaving the department for field leads
When the story sends Slater outward, the game often keeps CCPD as a return hub. After Quick Fix or Gutters End sequences:
- Walk the full department again for moved papers or new messages.
- Re-check the board for pinned photos you could not place earlier.
- Listen to any tape labeled new or rewound.
Cross-reference worker guides: Quick Fix for hot dog shifts and Jank Wagon beats, Gutters End for lane closing and back rooms.
Common stuck points (without fake solutions)
| Symptom | What to try |
|---|---|
| Interview ends but door stays locked | Leave the room and re-enter; talk to NPCs in the hall |
| Tape plays static only | Acquire the matching photo or report first |
| No new leads after worker chapter | Return to desk and interact with case board twice |
| Objective feels invisible | Walk entire unlocked CCPD footprint slowly |
If nothing changes, you may be ready for the next scripted perspective swap—continue the full walkthrough order rather than hunting numeric codes online.
Atmosphere and difficulty notes
CCPD is slower than victim chapters but not safe. Jump scares still land in archives and late-night hallways. Keep headphones on; audio cues sometimes precede visual ones.
There is no combat training here. Success is observation, patience, and connecting Carrion City’s sleaze to the killer’s gallery.
Spoiler boundary
This page stops before finale identity reveals and multiple endings. Those topics are centralized on endings explained with explicit warnings.
Related chapters
- Walkthrough Hub — order and spoiler policy
- Full walkthrough — entire game spine with video
- Quick Fix — Hexy’s store shifts
- Gutters End — Blair’s bowling alley
- Endings — major spoilers
Frequently Asked Questions
Quick answers for Carrion City survivors.
Do I play all of CCPD before Quick Fix?
The full game interleaves perspectives. Follow the story’s cuts rather than forcing one location. When Slater is active, stay at CCPD until exits unlock, then check the full walkthrough for swap timing.
Why will my tape not advance the case?
Tapes usually pair with photos or witness names. Finish nearby desk interacts and re-read the board before assuming you need a hidden code.
Is combat important at CCPD?
No. Slater’s chapter is investigation and atmosphere. Mechanical difficulty rises later in victim perspectives—see Quick Fix and Gutters End.
Can I skip CCPD on a second playthrough?
You can move faster by knowing layout, but story triggers still require key desk beats. Speedrunners should still interact with mandatory files once.
Where are ending spoilers?
Not here. Use endings explained only when you accept full story ruination.